|
Settings |

|

|
|
|
Settings |
|
|
Settings
|
Settings |
|
|
|
|
Settings |
|
|
Through the toolbar you can change a few settings.

Resolution
As every pixel is calculated in detail, the size has windows has a huge influence on the speed. You can speed up the calculations by unchecking the “Automatically resize” checkbox and by entering values for the output size. The resulting image will be scaled in proportion to match the window.
Draft Quality.
If you use this option, the raytracer will stop at some point, releasing CPU resources to other processes, like the engine
Use denoiser
The raytracer uses an algorithm known as a Pathtracer. Depending on the lights you use in the scenery, it can lead to noise. The Denoiser will remove the noise and generates a better image.
Background
You can change the background of the image
Use Tone Mapper
The tone mapper changes the output color of the image slighter into a more cinematic experience
Field of View
In photography, the field of view is that part of the world that is visible through the camera at a particular position and orientation in space
Screenshot
You can save a screenshot of the current board to a file.
Change Camera
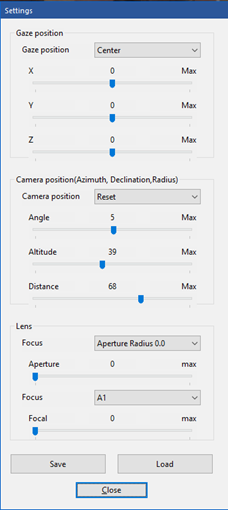
The gaze position is where the camera will be looking at. A few presets are applied. For example you can control to camera to look at a specific square.
Camera Position
This is where the camera is positioned, relative to the gaze position. Here a few presets are defined. For example if you select “Top Down” the camera will be position right above the gaze point.
Lens
If you wish you can set Aperture radius and focus so that parts of the image will be blurred, also known as the bokeh effect, which generate appealing images.
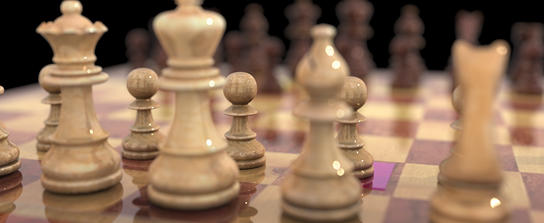
An example of using Aperture radius and focus:
Save and Load
You can save a camera setting for later use and retrieve it back by using "Load”.
Change Light
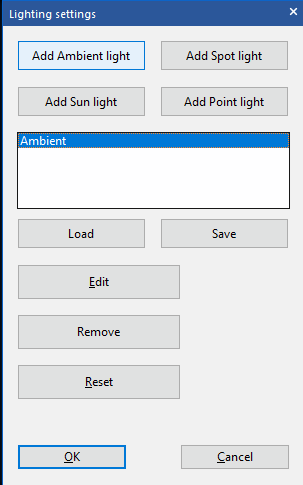
Normally a scene has one more more lights. The most common light is “Ambient light”. It will lit everything in the scenery. In Fritz you can use 3 other types as light as well.
Spot Light
A spot light behaves exactly how it sounds, like a real spot light, and provides a very direct source of light. One of the key benefits that you get when using a spot light is the directionally that you get from the light. The spot light is emitted through a cone and you can control how wide the cone angle is which determines how much of the area is actually illuminated. Objects closer to the spot light will be brighter, and depending on the how wide the cone is the light will either be softer or harder
Sun Light
A directional light mimics the lighting that you would get from the sun. Directional lights emit parallel light rays in a single direction but the light reaches out into infinity. You can think of a directional light as a giant flash light very far away from your objects, always centered and it never dies off. You can rotate the light in any direction
Point Light
Point lights are the most common light types found in 3D software. A point light is very similar to an incandescent light bulb that emits light in all directions. You can think of a point light as a sphere of light filling an area. Objects closer to the light will be brighter, and objects further away will be darker. Point lights are great when you need to illuminate areas with a smooth falloff in all directions, or create a light that has a single point as its source, like a lamp or candle
In Fritz you can Add, Delete and change all those different types of light, enabling to experiment with different settings. For every light you can change the color.
Reset
At any time you can go back to a default lightning, which is an ambient light.
Advanced functions
If you enjoy changing the camera and the light, you might want to go a step further and change the material of the board and pieces.
For raytracing a few basic materials are used for example, Metal, Alloy, glass and Metallic.
Press "Board", "White” or “Black” to change the material. In order to apply the changes press "Apply"
Camera navigaton buttons
![]()
Those buttons can be used to change the camera position. The first two are to zoom in and out.
Next 4 are to till the board, left, right, up and down.
The last two are for moving the board upwards and downwards.